Birmingham: A Pleasant Surprise for the Artsy Traveler
Are you considering a trip to Birmingham?
Back in the day, industrial Birmingham did not have the best of reputations.
I lived in England for four years in the 1970s and have been back many times, but never have I put Birmingham on my itinerary.
I remember changing trains there in 1979 and walking quickly and a tad nervously between stations.
But over the last few decades, Birmingham has undergone a transformation. And yes, it’s well worth a visit!
Birmingham At a Glance
- Where to Stay: AC Marriott hotel
- Best Site: National Trust Birmingham Back-to-Backs
- Excellent Art Gallery: Barber Institute of Fine Arts
- Tour Option: Birmingham Walking Tour
Why I Went to Birmingham
While planning a solo trip to England, I put Birmingham on my list for one reason only. I wanted to visit a National Trust property called Birmingham Back to Backs.
It’s not a grand country house like the vast majority of National Trust properties, but rather a nondescript collection of cramped houses built around a courtyard in the style known as back-to-back.
For over two centuries, millions of Britons (including some of my ancestors) lived and worked in this type of housing.
I was writing a novel set in a mill town in Yorkshire in the 1890s and wanted to know how regular people lived. Since the Birmingham Back to Backs property is the only one of its kind left in England, I booked two nights in Birmingham to see it.
But I had zero expectations of what else I’d see and do while in Birmingham.
Birmingham Map
The map below includes all the locations mentioned in this post. I suggest staying in the Gas Street Basin area (see below). You can walk pretty much everywhere from there or grab an Uber.
Arrival in Birmingham
I arrived by train from Stratford-upon-Avon to Birmingham New Street Train Station (#5 on the map above) at 7 pm after a wonderful day tootling around the Cotswolds on a Go Cotswolds tour and took a taxi to the AC Marriott hotel located on the edge of the Gas Street Basin (#3 on the map above) in Birmingham’s bustling and refurbished city center.

The second largest city in England, Birmingham appears to be booming.
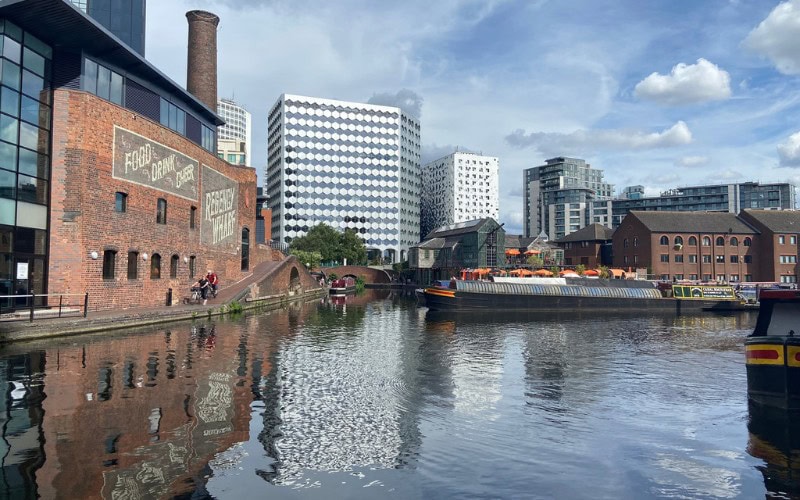
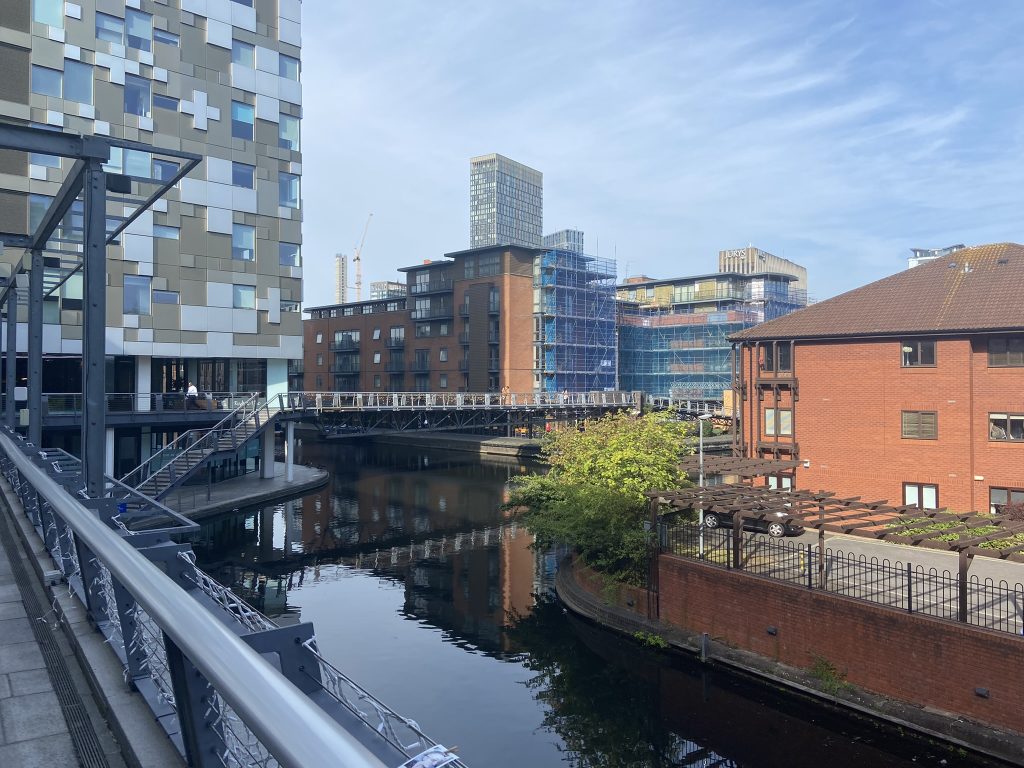
After checking in to the hotel, I emerged quayside to the Gas Street Basin to survey a plethora of modern architecture, colorful boats cruising along canals lined with posh restaurants and bustling pubs, and throngs of people out having a good time.
Birmingham apparently has more miles of canals than Venice. Who knew?
The city planners got things right with this area of Birmingham. It’s incredibly people-friendly with its canal-side walkways and aura of peaceful prosperity.
A Full Day in Birmingham
While enjoying my first coffee of the day at a coffee shop on the main floor of the hotel, I tried to listen in on the conversation between two men sitting next to me.
They were speaking English—I think. The famous Brummie accent really is just about incomprehensible, at least to me.
I needed to listen very, very carefully to hear more than a series of rumbles and mumbles with swallowed consonants and vowels and glottal stops. Clipped words emerged from throats that sounded like they’d been stuffed with cotton. I worried the men were choking, but no, they were just having a regular conversation. I’ve eavesdropped on French conversations and understood more!
So far, I’ve had to ask anyone I’ve interacted with to repeat themselves several times. Even a phrase like Anything else? asked by the coffee person comes out as noise.
And I thought the Scots accent was hard to understand! The Birmingham accent has it beat, hands down.
Birmingham Back to Backs
As mentioned, I decided to spend a full day in Birmingham to tour the Birmingham Back to Backs (#1 on the map above), a National Trust property that promises to let visitors experience 200 years of working people’s lives in the heart of Birmingham.
A hundred years ago, the Midlands and North of England were full of these brick structures built to accommodate the millions of factory workers needed to keep the industrial revolution ticking over.
I purchased my ticket a month prior (pre-booking is essential) and arrived at 10:30 am for the first tour of the day.

For almost two hours, I enjoyed one of the most comprehensive and interesting tours I’ve ever experienced.
The National Trust is known for its stewardship of massive stately homes—domains of the 1%. I’ve visited many of these homes over the years and marveled at the art and architecture.
The Birmingham Back to Backs are at the opposite end of the wealth spectrum. That the National Trust also recognized the need to preserve the type of building in which a great majority of the population lived right up until the early 2000s is to its credit.
What are Back to Backs?
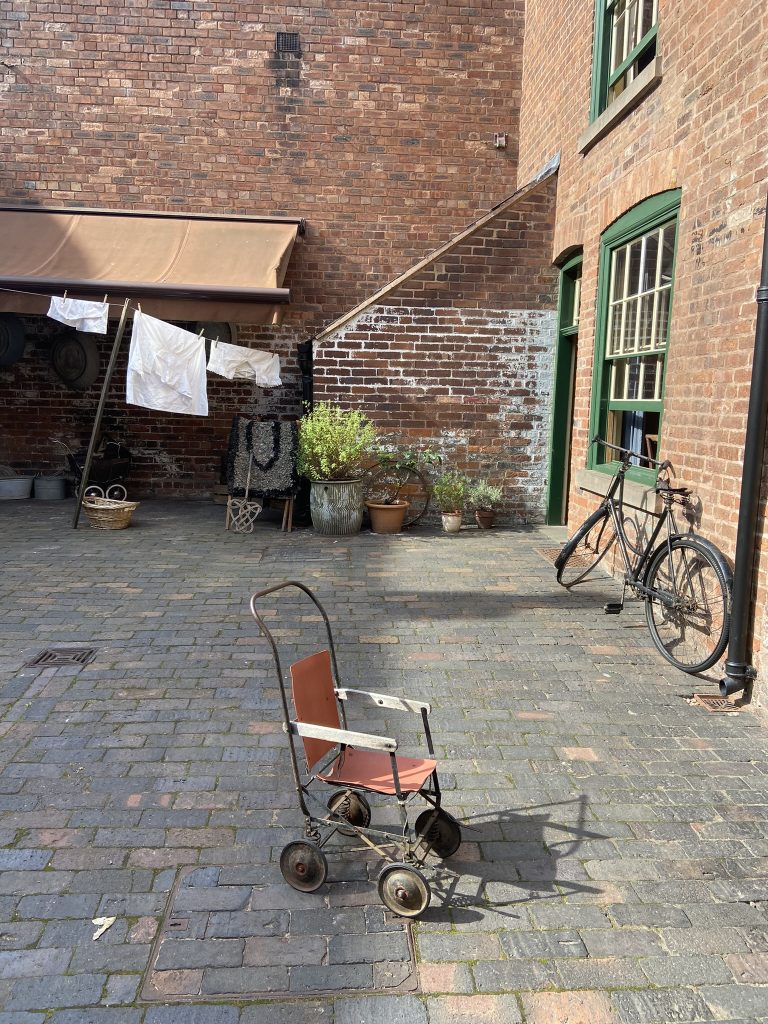
The Back to Backs are houses built, as the name suggests, back-to-back, with half the houses facing the street and the other half facing an inner courtyard.
A collection of these houses is known as a court. Some courts included dozens of houses.
The National Trust has preserved Court 15, a community of eleven houses thought to have housed over 500 different families over its 200-year lifespan.
A very knowledgeable guide took our group into four homes and related the stories of the occupants from four time periods between 1840 and 1977. In our group of 9, everyone except me hailed from England.
One of the men, who was about my age, told us that his mum had been born in a Back to Back. I’m pretty sure my grandmother and certainly my great-grandmother would have lived in similar housing up in Yorkshire.
House 1: 1851
Each of the four houses we visit was decorated in the style of a different time period.
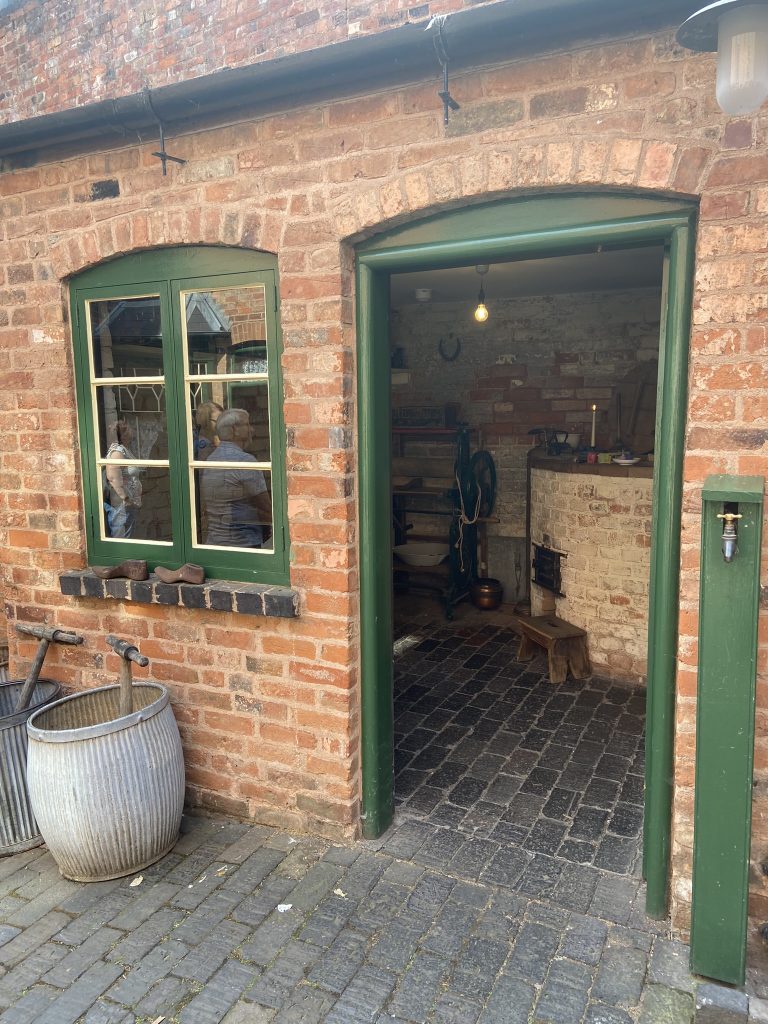
The first was from 1851 and was occupied by the Levys, a Jewish family who migrated to Birmingham from London. The house was surprisingly comfortable, even spacious, although certainly not luxurious. Lawrence Levy had been a watchmaker and had his workshop on the top floor.
We climbed up and down tiny twisting stairways numerous times during the tour.
Handrails and grips were provided for safety, but the guide informed us that back in the day, none of the staircases would have had handrails.
She asked us to imagine how agile a woman would have needed to be to mount the stairs while wearing long skirts and carrying a candle in one hand and probably a baby in the other. Apparently, accidents were common, and no wonder.
Even hanging on with both hands, I could barely make it up some of the almost vertical stairways!
House 2: 1860s
The next house we entered belonged to the Oldfield family who lived in one of the back houses in the 1860s.
Eleven people lived in the house at that time—two parents, seven children, and two lodgers all crammed into three floors consisting of one room per floor that also included space for Herbert Oldfield’s workshop. He was a glassworker who made glass eyes for dolls and stuffed toys.
One of the double beds had four pillows—two at each end. Four children would have slept top to tail in the bed, with likely one more in the middle! The guide also showed us a bureau drawer in which the baby slept.
A curtain divided the children’s bed from another double bed slept in by two lodgers.
A man and a woman (unmarried) shared the bed but apparently not at the same time. One worked the day shift and the other the night shift so they were two ships passing in the night.
Their space was bare of everything except a bed and a high shelf on which was stacked a small collection of books. The entire room was maybe 12’ x 12’.
The overcrowding must have been horrendous—and yet very common. My great-grandmother with her twelve brothers and sisters would have lived in a similar place when she was young.
She eloped in 1903 and emigrated to Canada in 1911 when my grandmother was five years old. The log cabin she inhabited in British Columbia with her four children and no running water must have seemed like paradise compared to the housing of her youth.
House 3: 1830s-1935
Three generations of the third family—the Mitchells—lived at Court 15 from the 1830s, when water had to be brought from the well a few blocks away, until 1935 when the houses had basic plumbing and electricity.
The prevailing feeling in the small rooms was how cramped, dark, and uncomfortable they must have been to live in. The upper floors had no heat, and damp was a constant problem.
House 4: 1960s-2002
The final house was lived in by George Saunders who migrated to Birmingham in 1958 from St. Kitts in the Caribbean.
By that time, the ground floor of Court 15 had been converted to shops with some people still living in the floors above. George was a tailor and the last person who worked in Court 15 before its closure in 2002.
Special Exhibition at Birmingham Back to Backs
After enjoying the tour (highly recommended), I toured the special exhibitions.
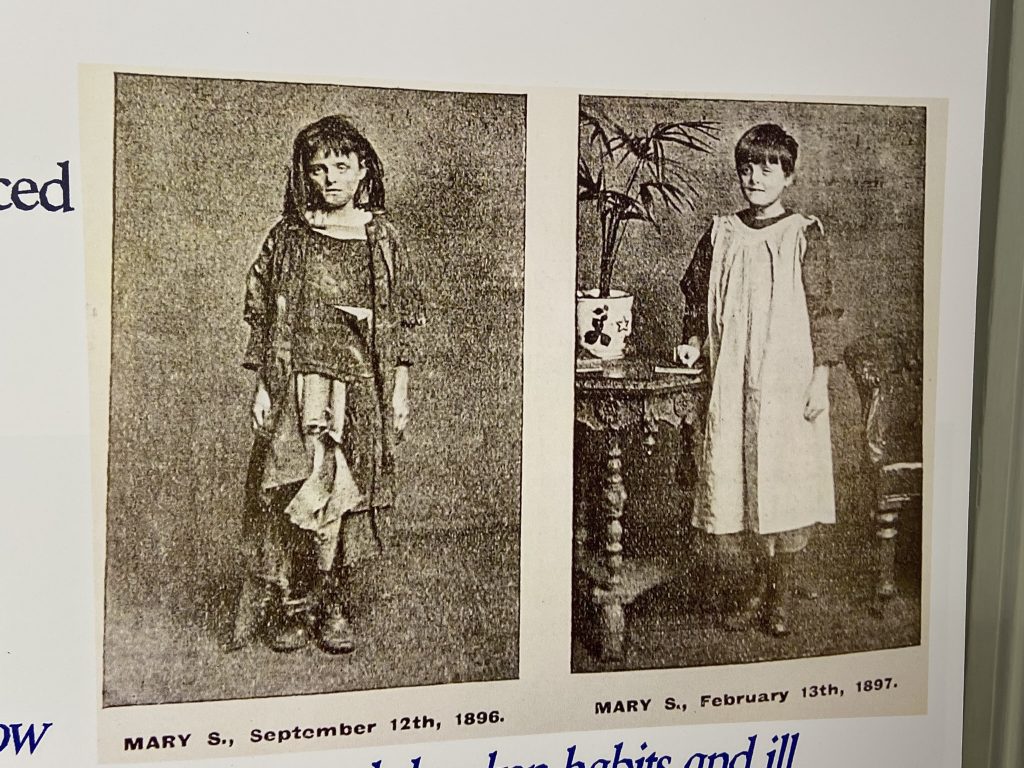
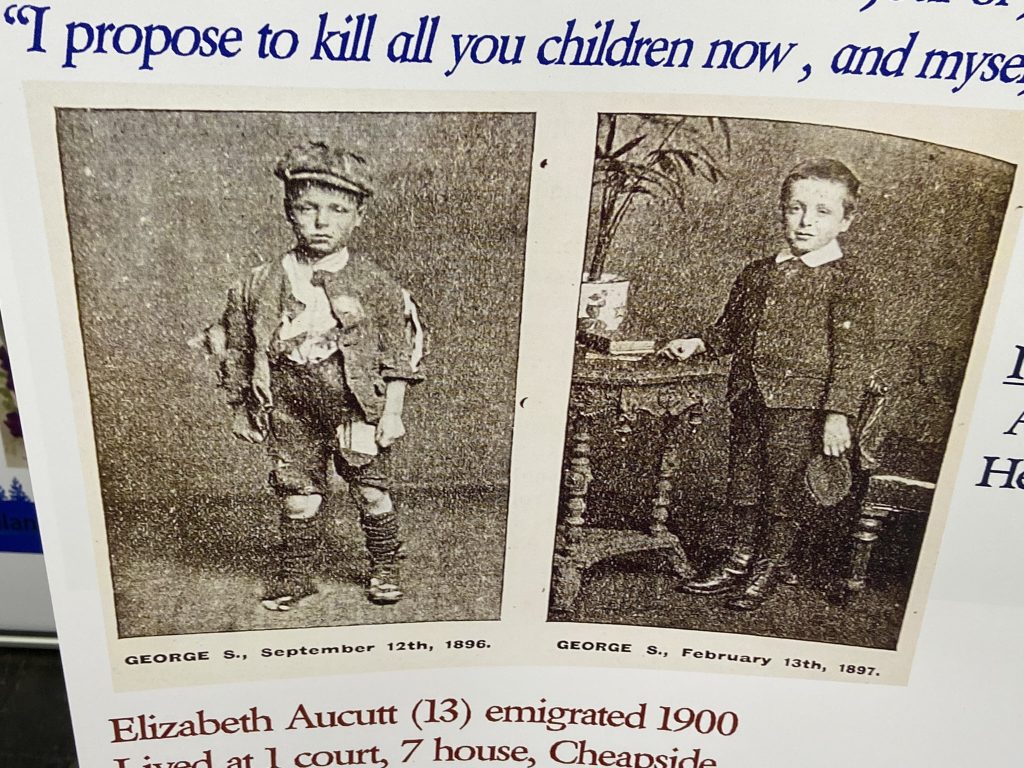
The most interesting documented the Child’s Emigration Homes founded by John T. Milldemore in 1873. The Homes sent 5000 orphans and desperately poor children from Birmingham to Ontario, Nova Scotia, and British Columbia in Canada. Between 1922 and 1955, they sent another 259 children to Australia.
While some children thrived in their new homes, others did not and suffered terrible abuse. The pictures and commentary are both heartbreaking and compelling.
Birmingham Back to Backs Practical Information
Operated by the National Trust, the Birmingham Back to Backs are accessible only by a guided tour that you must book in advance. Here’s the link. Tours are offered from 10:00 to 15:00 daily (closed Monday). Admission is free to National Trust members. Non-member prices are £9.50 for adults and £4.75 for children.
The Barber Institute of Fine Arts
After a lunch of leftover chicken wings from my dinner the night before, I set off for the Barber Institute of Fine Arts (#2).
I had wanted to visit the Birmingham Museum & Art Gallery (#6) which is said to be world-class and have an excellent collection of paintings by the pre-Raphaelites. However, it was undergoing renovations, with almost all the galleries were closed.
Housed in an imposing building on the campus of the University of Birmingham, the Barber Institute of Fine Arts was also reputed to have a fine collection so off I went.
I took my first Birmingham Uber with a young man originally from Haiti who was very interested in learning all about Canada.
We had a great chat as he drove me through the posh area of Birmingham with large houses and leafy avenues on our way to the university.
The Barber Institute Collection
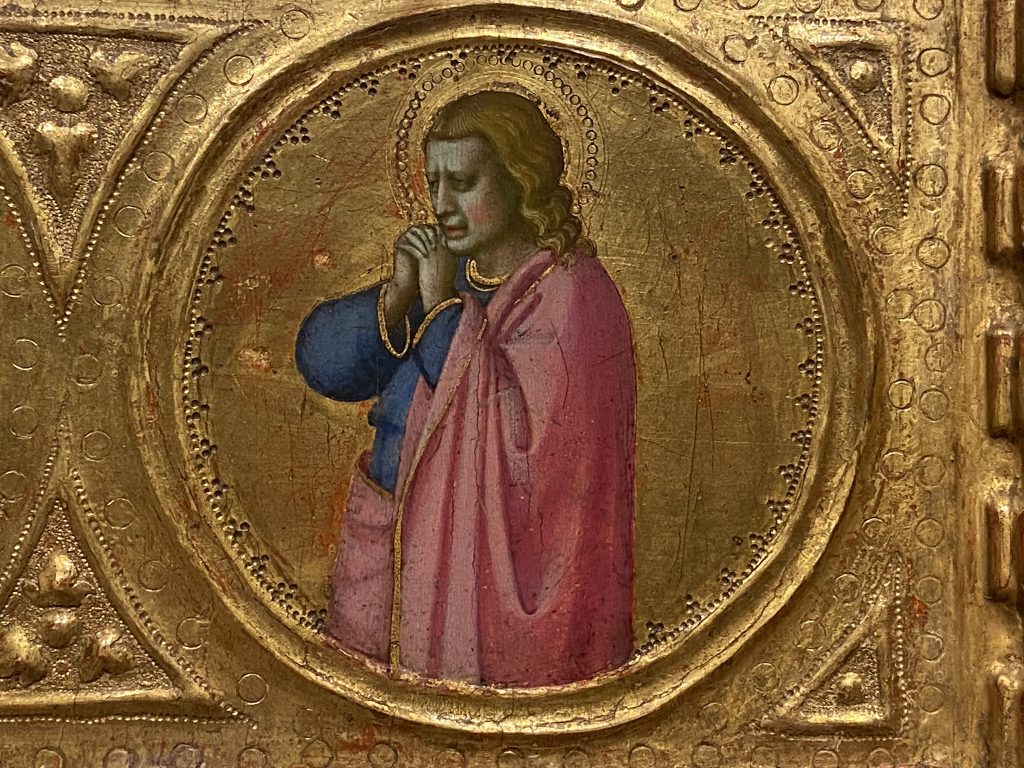
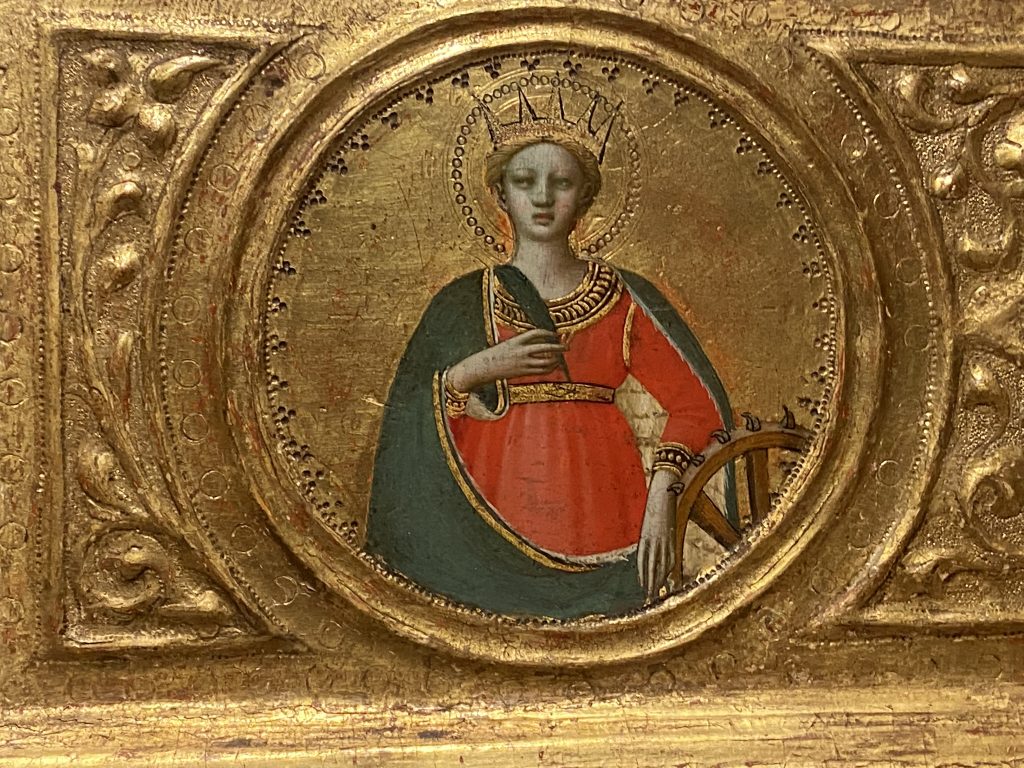
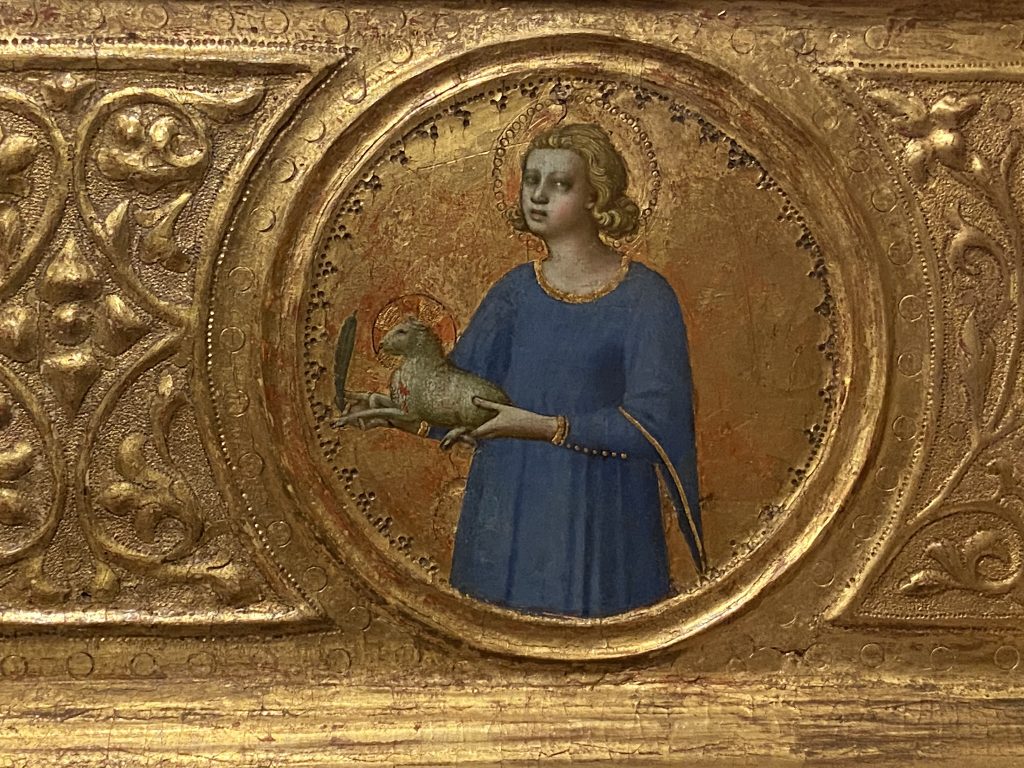
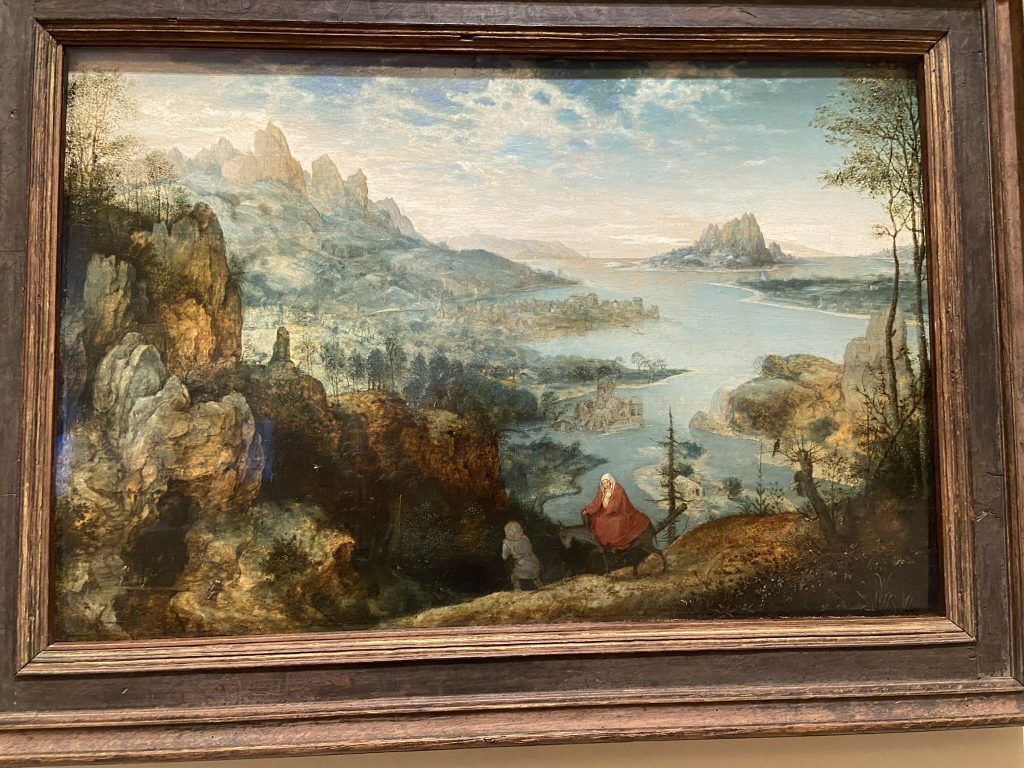
The collection at the Barber Institute of Fine Arts was small but quite exquisite. I spent a happy hour wandering past works from the 14th to the 19th centuries. Here are a few highlights.
Dürer Special Exhibition
One room was dedicated to a special exhibition of etchings by Albrecht Dürer. I’ve had a soft spot for Dürer even since touring his house in Nuremberg.
Medieval Art
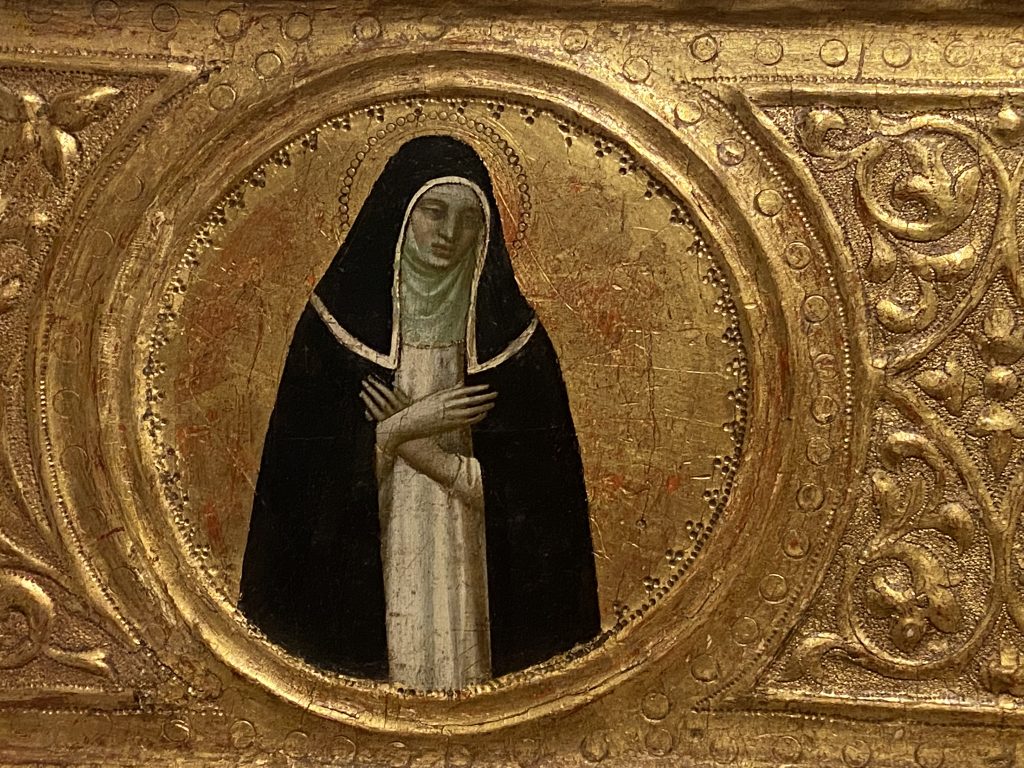
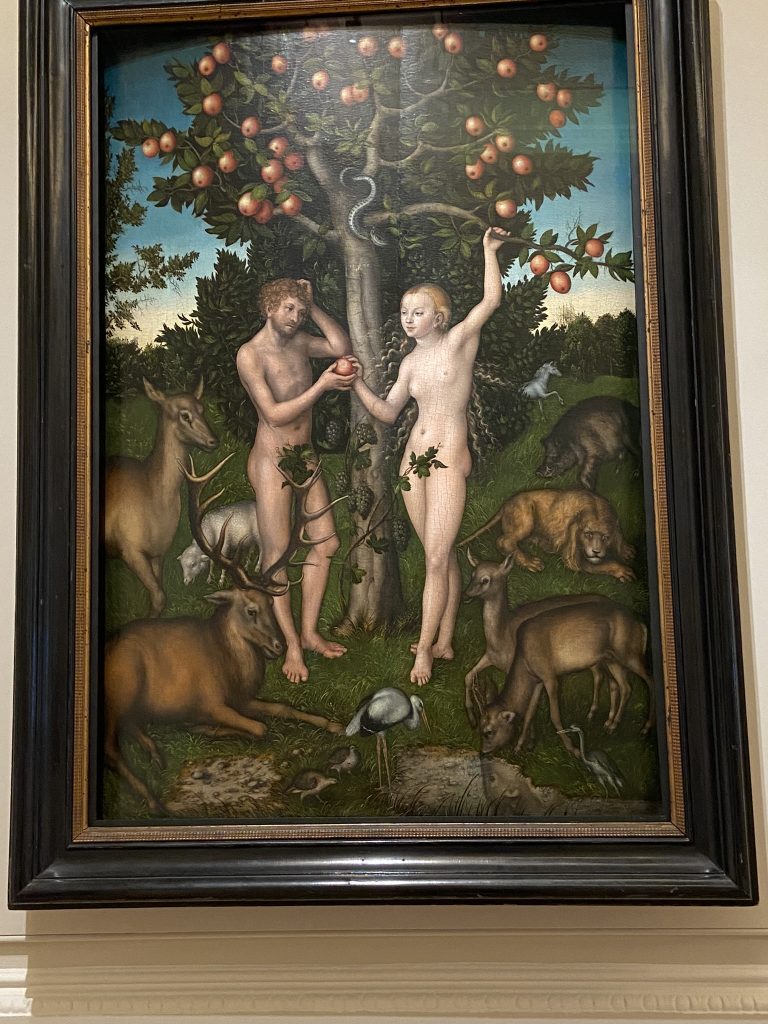
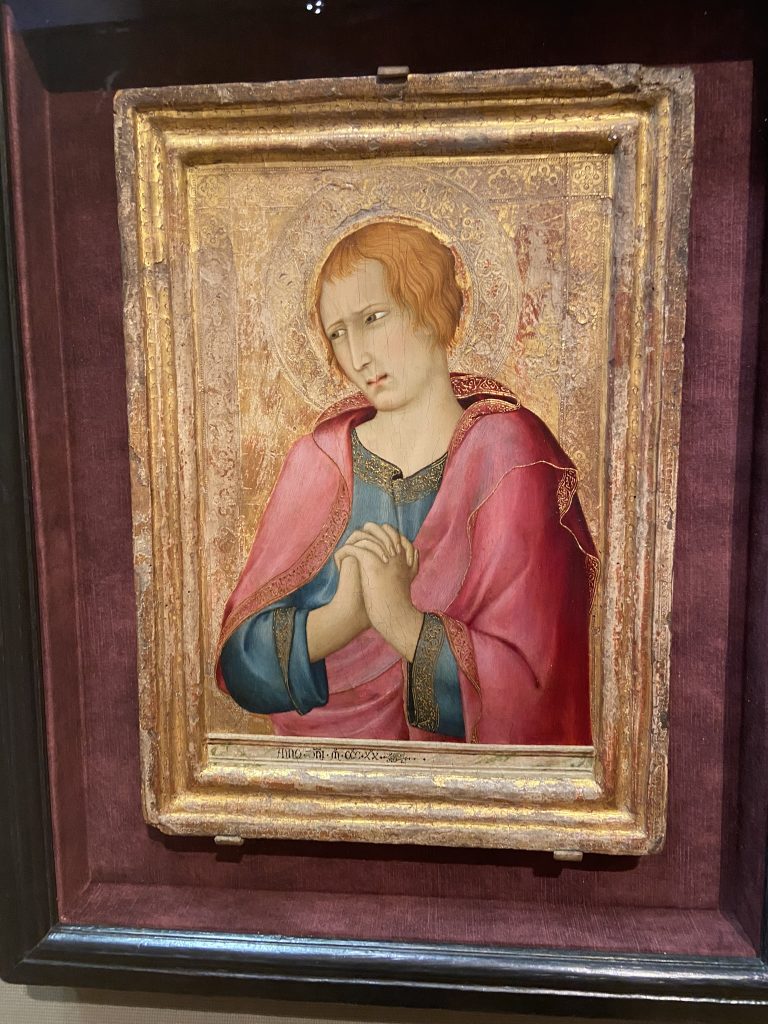
One of the first rooms included a good collection of medieval art (always my favorite).
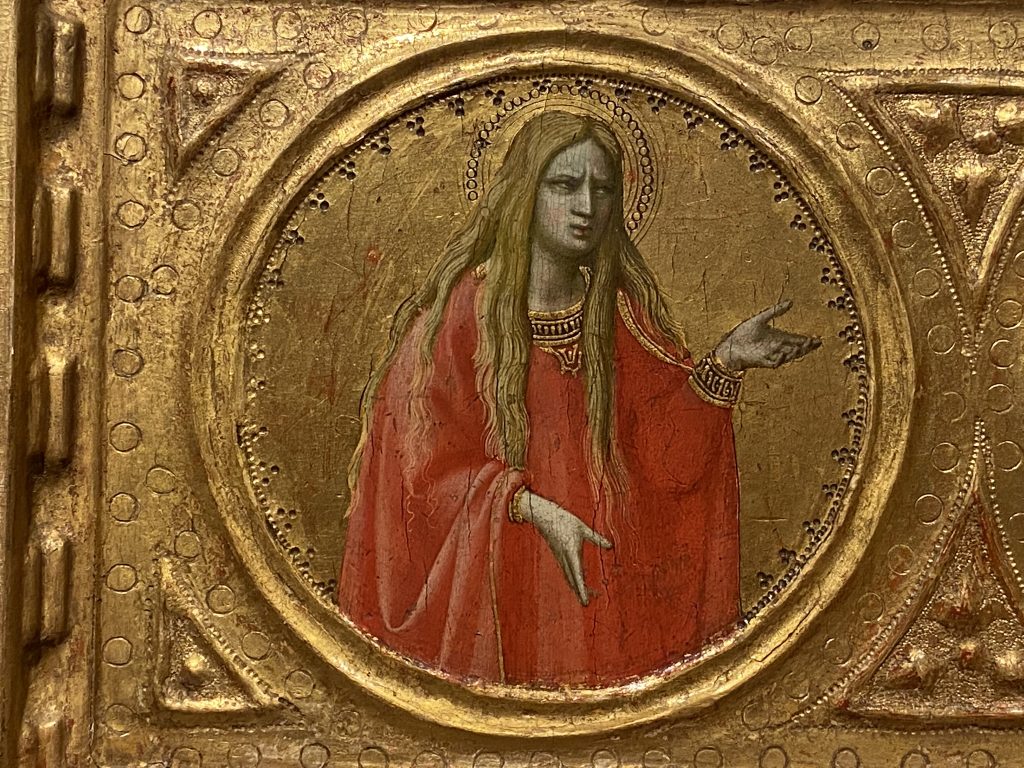
Here’s a piece by Simone Martini (1284-1344) of Saint John the Evangelist. Painted in Siena in 1320, the piece originally formed the right-hand panel of a triptych. Although there is no signature on the piece to prove it was painted by Martini, the refined use of color, the elegant borders to the drapery, and the decoration in the gilding are characteristic of Martini’s style, which was very innovative for the time.
Flemish Art
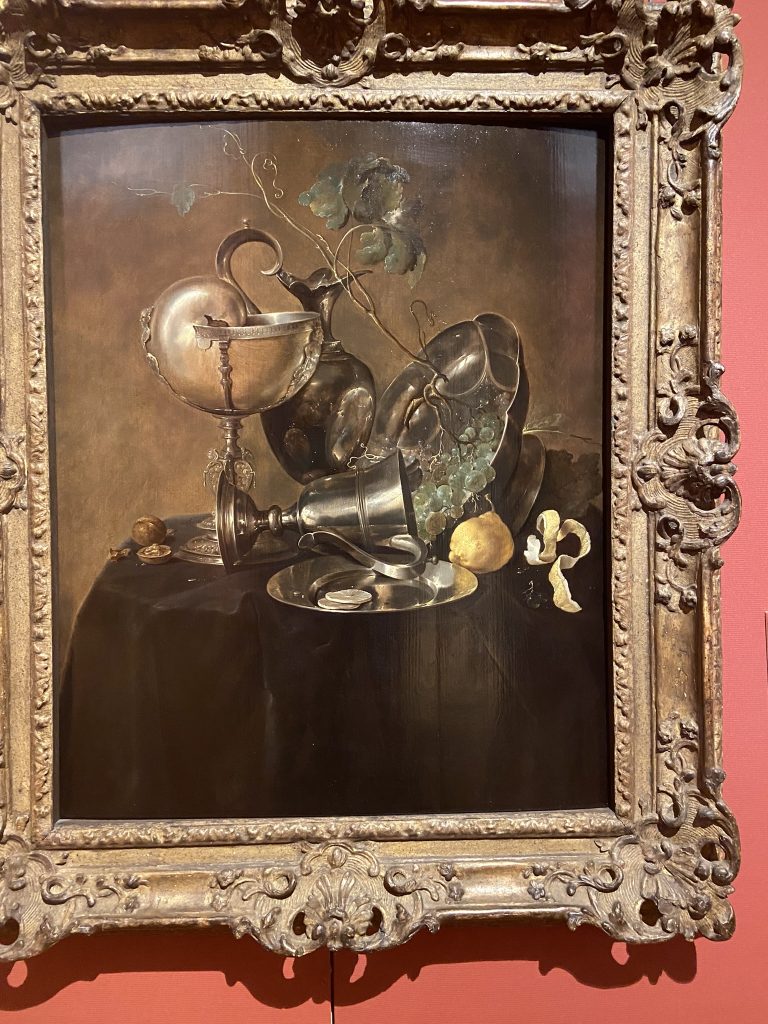
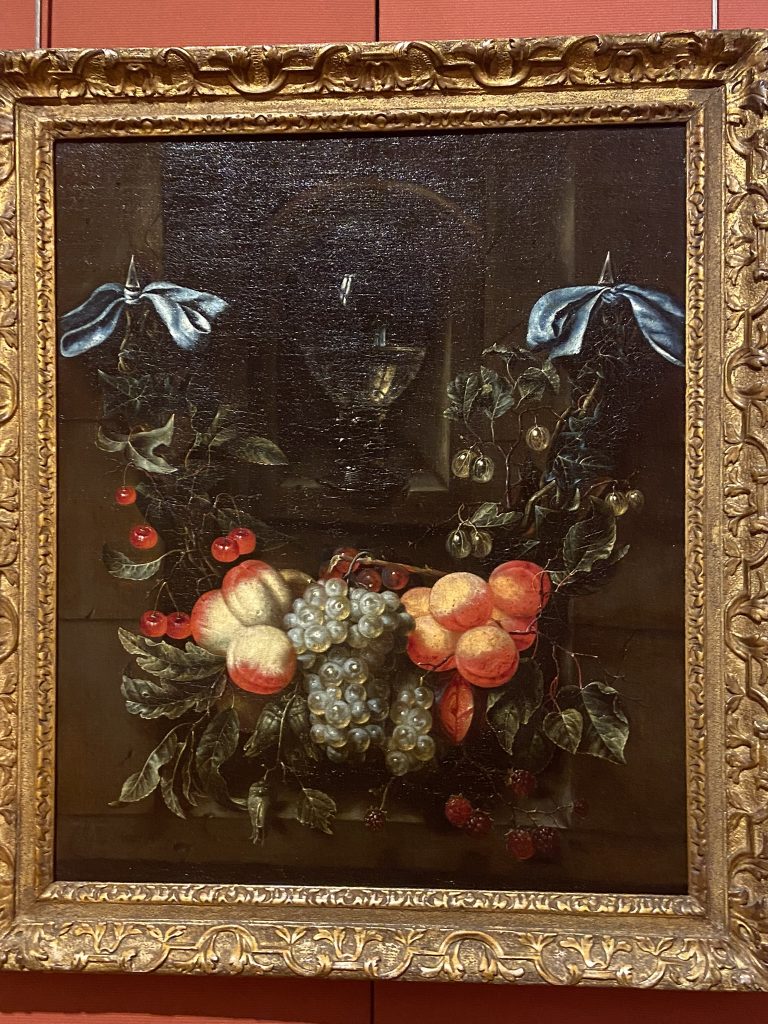
I am fascinated by the still life paintings common in Flanders during the 16th and 17th centuries. The Barber had several interesting examples, including the two shown below.
A Still Life with a Nautilus Cup by Jan Davidsz de Heem
I love how the objects have been arranged in this painting to demonstrate how well the artist is able to show the play of light on different materials–shell, pewter, leaves, fruit, etc., using only a few colors.
Jan Davidsz de Heem (1606-1683/4) lived in Leiden, Holland.
Still Life with a Garland of Fruit by Maria Tassaert
A woman artist! You don’t see many of them, although I’m noticing in recent trips to Europe that changes are afoot. In most galleries, I found a least a few paintings by female old masters as more and more of them are being rediscovered and given their due.
Maria Tassaert (about 1642-1668) lived and worked in Antwerp in Flanders.
The painting is a celebration of Nature’s bounty and the artist’s technical skills in depicting a cluster of fruit that includes cherries, white peaches, white and black grapes, nectarines, raspberries, blackberries, and gooseberries in addition to ivy and fruit-tree leaves.
Impressionists
The Barber Institute includes a few beautiful paintings from the 19th century, including a very fine Renoir.
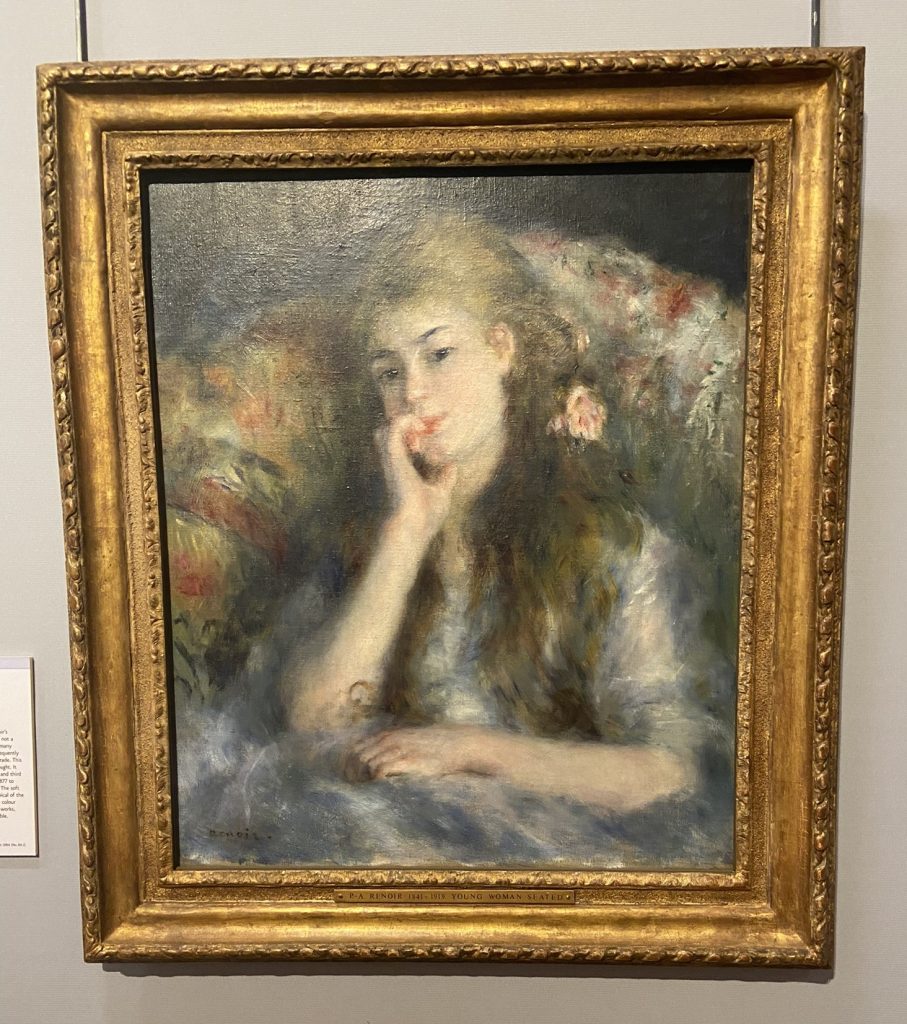
A Young Woman Seated by Pierre-Auguste Renoir
This work became know as La Pensée or Thought and was painted around 1876. The soft oranges, reds, greens, and blues are typical of the Impressionist pallette during that period.
Pre-Raphaelites
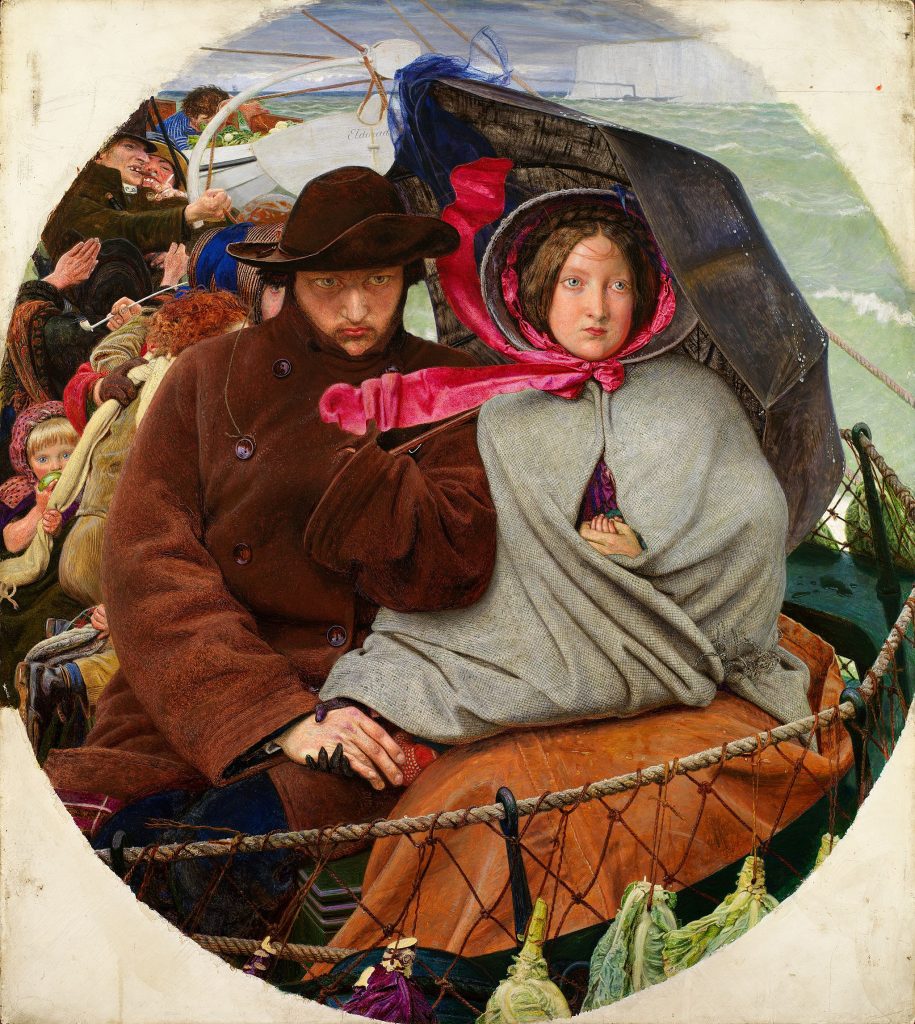
The Last of England by Ford Madox Brown
One of the Barber Institutes major works is The Last of England by pre-Raphaelite artist Ford Madox Brown. It’s one of the masterworks of Victorian painting and one of the very few pieces in the collection that I was not allowed to photograph. Thank goodness for Wikipedia Commons (see picture below).
The painting depicts a young family huddled together on an open boat on their way to a ship that will take them from England to a new life in the colonies. The resigned expressions on their faces as they leave behind their home is caught with painstaking detail.
Barber Institute of Fine Arts Practical Information
The Barber Institute of Fine Arts is located on the campus of the University of Birmingham and is open Tuesday to Sunday from 10:00 to 17:00. Admission is free.
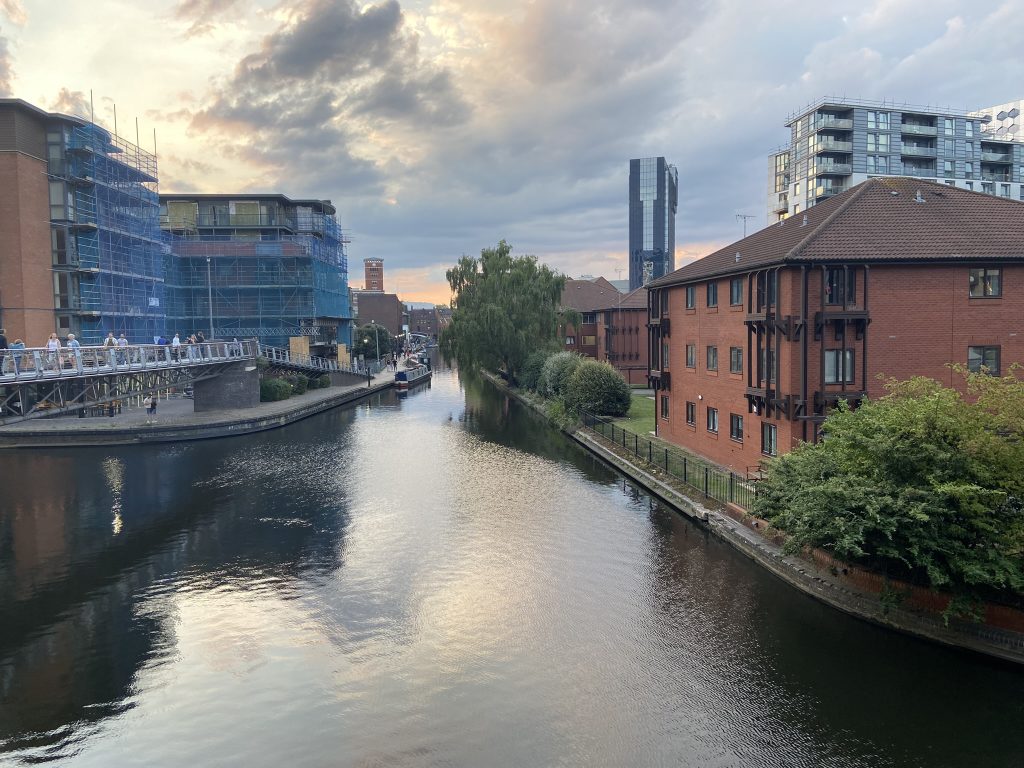
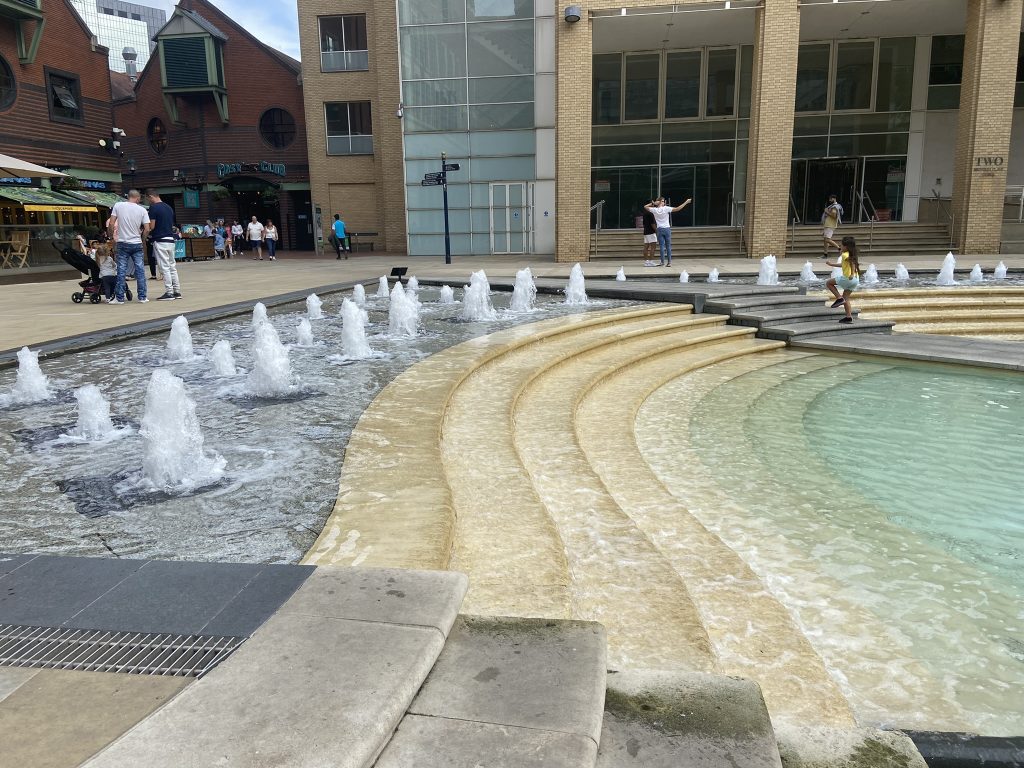
Strolling Around the Canals
I took an Uber back to my hotel and went for a stroll along the canals in the area immediately adjacent to Gas Street Basin (#3) where I was staying.
Restaurants and upscale pubs line the canals which were teeming with people enjoying the Bank Holiday Sunday.
The prevailing atmosphere was prosperous, cheerful, and incredibly diverse. Everyone seemed to be under forty, many pushing strollers. People from all over the world have made Birmingham their home, which rivals London for the diversity of its population.
What Else to See and Do in Birmingham
With only a day to spare, I didn’t have time to enjoy all the delights of Birmingham. Here are some suggestions if you have some extra hours. I particularly recommend the walking tours.
Where to Stay in Birmingham
I recommend staying in the vicinity of the Gas Street Basin, preferably overlooking one of the canals.
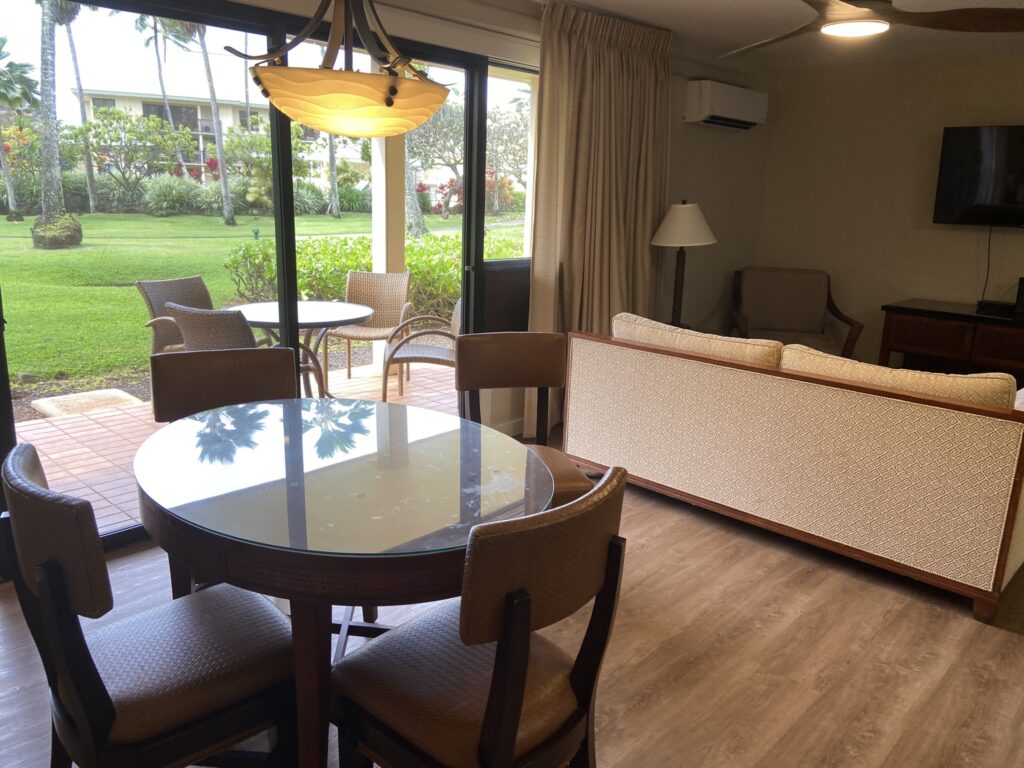
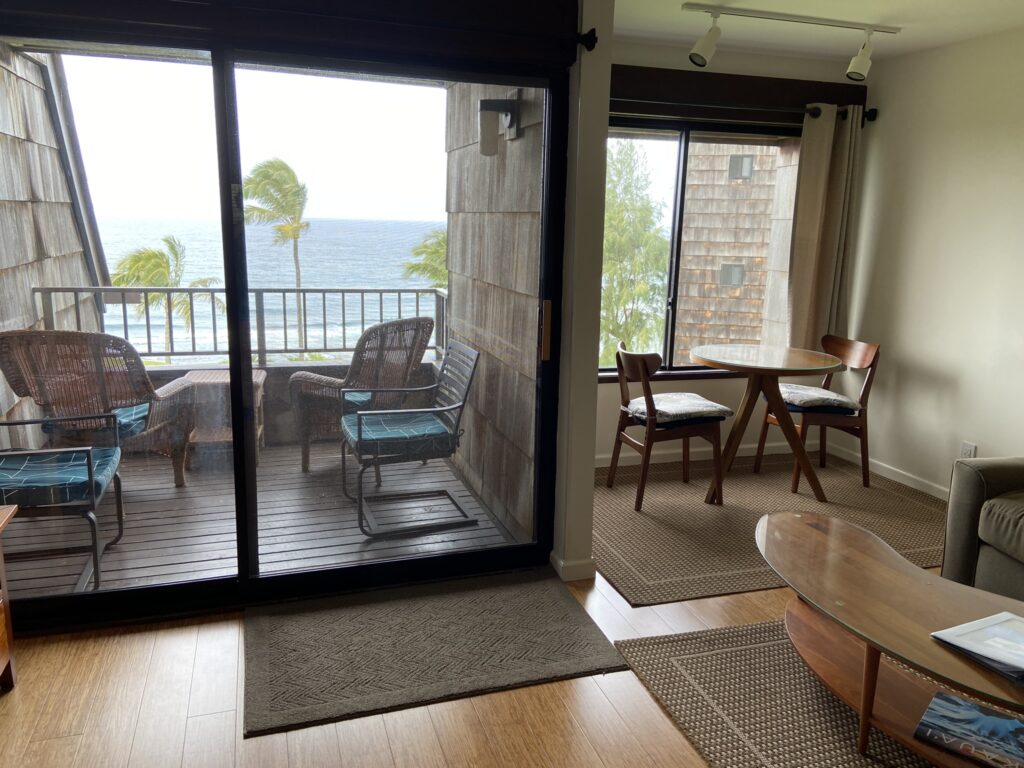
I stayed in the AC Hotel by Marriott and can recommend it. The room was spacious, the staff friendly and helpful, and the large bar very comfortable.
Also, the location overlooking the Gas Street Basin can’t be beat. Right outside your door are plenty of restaurants and cafes.
Here are some other options:
Birmingham Walking Tours
GuruWalk lists pay-what-you-please walking tours that connect tourists with tour guides all around the world. Check out their tours of Birmingham!
Conclusion
Have you visited Birmingham? Any suggestions for what to see and do? Share in the comments below.
Here are more posts about cool places to visit in England;